July 14, 2011 at 8:48 pm
Hello everyone,
Here is what just happened today:
I got a desktop dropped off at the shop which had a problem of shutting itself down after about 5 to 10 minutes.
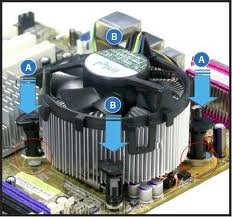
I checked the power supply, the fans, the RAM, the hard drive, disconnected everything except the basics and still it would keep shutting down. Finally, I was going to change the CPU to see if that would help, and I found out that one of the clips connecting the heat sink to the CPU was broken. I found another heat sink/fan just like the one that was defective, changed it, and restarted the computer. The computer has been running fine ever since. Obviously, without a tight connection between the CPU and the heat sink the CPU was overheating and shutting down to protect itself.
This was a new one for me! Some one had broken the tab off the connector. The power supply had been changed previously, and that might have been when it happened.
You just never know until you do a thorough troubleshoot!
Professor Randy says: The joy of the troubleshoot! Go through every step until you “solve the puzzle”, then you will learn your craft like no other!
Tags:
computer overheating,
cpu shutting down,
loose heat sink,
troubleshoot overheating computer
July 8, 2011 at 10:11 pm
Tags:
latest tech information
July 4, 2011 at 11:44 am
Hello everyone,
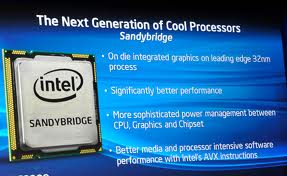
Back in January, in this post, I wrote about the new Intel second generation processors (Sandy Bridge). I couldn’t wait to “get my hands” on one of these fantastic new Core i3, i5, and i7 chips. The following month I wrote another post gushing specifically about the absolutely awesome second generation Core i5. I personally was “drooling” over the 3.3GHz Core i5 2500K.
But then, as you probably already know, the bottom fell out! The motherboards (chipsets) for the awesome Sandy Bridge CPUs were found to be defective. The SATA 3Gb/s ports were prone to fail over time, and Intel pulled the production plug. Intel had to pay millions of dollars to replace the bad chipset and the systems that were affected by the bad boards.
The good news is that the issue has been fixed now for some time. To avoid any confusion, look for motherboards that have a “B3” designation on the outside of the manufacturers box as well as inside on the CPU (motherboard) itself. The defective boards were designated as “B2” motherboards, but after the recall, fix, and re-release the new labeling is “B3”.
Professor Randy says: Now you can fully enjoy the incredible Intel second generation Sandy Bridge CPUs. The defective motherboard problem has been fixed! You can know for sure by looking for the “B3” logo (designation) on the box, on the CPU (motherboard) itself, and in the product specifications.
Tags:
B3 motherboard designation,
Intel Sandy Bridge CPU,
sandy bridge B3 motherboards,
sandy bridge mobo fix
July 2, 2011 at 4:15 pm
Tags:
latest tech information
June 28, 2011 at 10:42 am
Hello everyone,
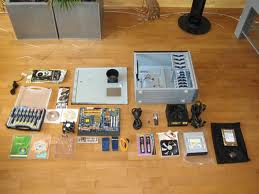
I just decided to build my own computer and I’m pretty psyched! I’ve carefully selected my components and I can’t wait to get started. I wanted to build an inexpensive, fast, modern machine that will allow me to upgrade in the future. This is not a gaming machine but it could easily handle some games as is. If I ever wanted to run high resource games I would have to upgrade a few components.
I was not interested in overclocking the CPU and I had no need to buy a “snazzy” gaming case. I didn’t need a huge hard drive nor a blu-ray optical drive. My budget was $550.00 and I am very happy with the components selected.
Here are the components that I have selected:
CPU: Intel Core i3 2100 = $125.00
MOTHERBOARD: ASRock P67 EXTREME6 (B3) = $190.00
MEMORY: Crucial 4GB (2x2GB) DDR3 133 = $40.00
CASE & POWER SUPPLY: Cooler Master Centurion 534 + 460W Power Supply = $65.00 (combo deal)
GRAPHICS CARD: The ASRock mobo has no onboard video chipset so it is unable to take advantage of the very good graphic capabilities of the Intel Core i3 2100. I decided on the very basic but decent EVGA GeForce 8400 GS = $25.00
HARD DRIVE: Western Digital Caviar Blue 320GB 7200RPM 16MB Cache = $40.00
OPTICAL DRIVE: ASUS 24X DVD Burner = $20.00
OPERATING SYSTEM: Windows 7 Home Premium 64bit = $41.00 (from a 3-user family pack that I bought earlier)
A great and powerful computer for only $546.00 (easily upgradable too). Can you believe it!
Professor Randy says: There is nothing like building your own machine! You can handpick the components and get exactly what you want. Just make sure to leave room for future upgrades as you make your initial selection of parts.
Tags:
build your own new inexpensive computer,
computer components,
my $521.00 computer build,
my chosen components for my new computer build
June 27, 2011 at 4:10 pm
Hello everyone,
Many of my first time clients can’t understand why they get infected. They do all of the “right things”, but they still get bit. Our initial conversation usually goes something like this (me talking):
“Yes, it’s very good not to click on links in emails. Yes, it’s very good not to click on pop-ups that claim that your computer is infected. Yes, it’s very good to update and run a good antvirus. Yes, it’s very good to have your firewall turned on. Yes, it’s very good to not login to an account via an email link”.
But….
What about the myriad of third party apps that are not getting updated and therefore are full of security vulnerabilities just waiting to be exploited?
Many clients are totally unaware of this fact.
I see machines full of unpatched and/or outdated third party apps – and there are a mess of them. Consider the following:
Browers: Firefox, Chrome, Opera, Safari
Media: Apple iTunes, Apple Quicktime, Adobe Flash Player, Adobe Shockwave, Real Player
Runtimes: Adobe Air, Jave Runtime Environment
Utilities: 7-Zip, WinZip, Adobe Reader, Pidgin, BlackBerry Desktop Software
If any of these apps are out-of-date or unpatched, your computer is vulnerable to exploitation! What to do?
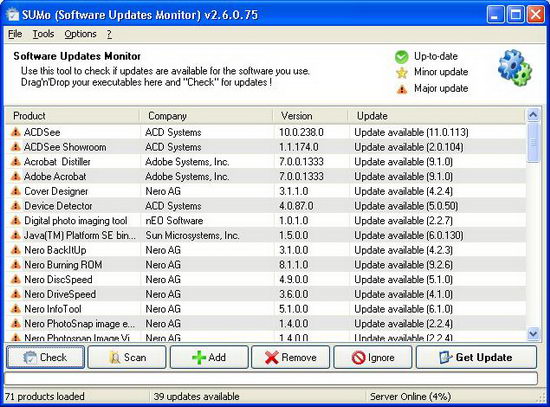
It is a “pain in the behind” to check out all of these third party apps manually. I really like SUMo (Sotware Update Monitor) to do this for me all in one swipe. SUMo will check all of your software and tell you which app needs to be updated to the most recent version. How great is that?
When you download SUMo, get the ZIP/7z version of the software to aviod any adware (Relevant Knowledge & Open Candy) that may piggyback along with the “good stuff”.
Professor Randy says: When protecting your computer from malware, don’t forget about those third party apps. You can avoid infection by using SUMo to tell you which ones need to be updated/patched.
Tags:
malware infection,
out-of-date software,
security vulnerabilities waiting to be exploited,
software update monitor,
SUMo,
unpatched third party apps
June 24, 2011 at 12:39 pm
Tags:
latest tech information
June 22, 2011 at 10:20 am
Hello everyone,
I see it all of the time. A clients hard drive will no longer boot up into the Operating System and panic sets in! When I go to their home the first question to me is always the same: Can you save my data?
Usually I can. Even though a hard drive will not load the Operating System, I can usually access the data on the drive in one of two ways. I explained the first method that I use in this previous post (I prefer this method in a sense because I don’t have to remove the defective hard drive from the machine).
My second method is explained here:
1) Remove the failed hard drive from the machine and hook it up to a known good working machine (two ways to do this)
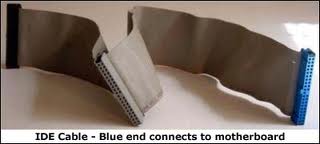
A) Open the good computer and install the failed hard drive inside. If the drives are IDE drives, one must be set up as the “master” drive and one must be set up as the “slave” drive (both drives will be on the same cable). If the drives are SATA drives, you don’t have to mess with the master/slave setup (each SATA drive will have a separate cable) Once both drives are connected you will be able to see the files from the failed hard drive and it is easy to copy them over to the good drive.
The advantage of connecting two drives straight to the motherboard is speed. IDE to IDE or SATA to SATA is faster than IDE or SATA to USB (explained in step “B” next).
B) Externally connect the failed hard drive to the good computer via USB. I use a USB 2.0 to IDE or SATA Drive Adapter to do this. Windows will find the new hardware (the old failed drive), and install the appropriate drivers. The failed drive will now show up (with a drive letter) in My Computer/Windows Explorer, and you will be able to see and access all files for transfer. File transfer speed will be a bit slower than step “A” above, but the overall setup is much easier and the results are just as effective!
How cool is that?
Professor Randy says: Recover your clients data from a defective hard drive and they will love you forever! The above method which involves connecting the failed hard drive to a known good working machine makes the recovery process a snap!
Tags:
master/slave drives on an IDE cable,
recover data from a failed hard drive,
SATA cables,
use a usb to ide or sata drive adapter to recover files from a failed hard drive
June 18, 2011 at 2:16 pm

Hello everyone,
I see it all of the time. A clients hard drive will no longer boot up into the Operating System and panic sets in! When I go to their home the first question to me is always the same: Can you save my data?
Usually I can. Even though a hard drive will not load the Operating System, I can usually access the data on the drive in one of two ways. The first method that I try is listed below (I prefer this method because I don’t have to remove the defective hard drive from the machine).
1) Download the latest release of Puppy Linux
2) Burn the Puppy .iso file image to a CD disc (I use CDBurnerXP to do this)
3) Boot up your computer using the Puppy CD (make sure that the computer BIOS is set to boot from the CD drive)
4) When the Puppy desktop appears you will see a hard drive “mount” icon (upper left hand corner of screen – see above image)
5) Click on the “mount” icon and you will see the the hard drive that you are trying to access (most likely called sda1)
6) Click on the “mount” button (just to the right of the sda1 drive). You will now see all of the files from the failed HD
Now That You See The Precious Data, You Have To Transfer It To Another Storage Device:
7) Plug in an external usb hard drive (or flash drive) and press “refresh” (bottom of Puppy Mount Loader window)
8) Repeat step #6 (but this time click the “mount” button to the right of the usb drive that you just plugged in)
9) You now have two windows open. One is the usb external storage device and one is the failed computer hard drive
10) Now just drag and drop the hard drive files into the usb external storage device, restart the PC, and you have recovered the data!
Professor Randy says: Recover your clients data from a defective hard drive and they will love you forever! The above method using a Puppy Linux live CD makes the recovery process a snap!
Tags:
puppy linux,
recover data from a failed hard drive,
use linux live cd to recover files
June 11, 2011 at 12:04 pm
Tags:
latest tech information


